Unlimited running rigging allowed in the US rules used at the WMG, gave an opportunity to analyse what improvements could be made to the Weta.
None more so than Masters Gold Medal winner, Martin Cross, who tested a number of modifications which either improved the handling or made the boat easier to sail with some tweaks that may have made it marginally faster and shared them with the Australian team members.
Martin also stresses the importance of marking sheets, halyards and controls – especially the jib and mainsheet where they go through the cleats – for upwind and downwind positions. You can use a “permanent” texter for this or for a real permanent solution, splice a marker into the line or use whipping.
| Mainsheet Traveller
|
Possibly the biggest improvement to the boat in terms of boat handling and safety, was the development of a traveller bridle using a line wrapped around the ama arms.
The benefits of using a traveller bridle are: Downsides are: Method This method requires no additional fittings to be attached to the hull. 2. Adjustable Traveller System (may not be class legal) 3. Extended Tiller 4. Cross System: To allow him to pull rather than push on the line, Martin’s adjustment line was further extended from the trolley cleat, through the eye of the rear tramp grommet on the opposite side and then fed through the opposite grommet and back through the cleat and around the ama arm to form a continuous loop . For permanent installation it might be better to add a nylon loop fitting bolted through the gunwale for the traveller lines instead of wrapping them around the ama arm. * Any small block will do but we found a large Ronstan Shock reduces the amount you have to allow for the traveller block to pass over the tiller and makes it less likely to catch as a result. Best to attach it to the mainsheet block using a 3mm dyneema core lashing. |
| Tiller lengthening
|
Having created your traveller, you really need to lengthen the tiller so it can pass underneath without catching on the bridle.
You can get away with not extending it and having the bridle loose to allow the tiller to move across underneath but it does restrict the tiller arc and it would lose some of the benefit of having the bridle tight.
The additional tiller length will depend on your preference, but you want it so that the tiller extension universal join doesn’t catch on the the bridle when you tack. It also needs to clear the cleats at either side and the “bump” of the ama arm sockets, so you may need to add washers at the base of the rudder gudgeon pin as a shim to raise the tiller stock slightly.
The easiest way is to extend it with a sleeve of carbon tube which fits over the existing tiller to extend it by 20-30 cm plus some extra that will overlap the existing tiller (min 10 cm). You could probably get away with aluminium/PVC tube if you can find some of a suitable internal diameter. Or even use a broom handle stuffed inside the original tiller tube packing it with tape around the handle.
Be aware that the tiller diameter is larger on the new boats (1000+) compared with the older ones – best to measure before ordering. I used 32mm ID carbon tube which just fits over the 30mm OD existing tiller with the tiller extension removed. Martin acquired a section of a broken carbon windsurfer mast and wrapped the old tiller with tape to create a tight fit.
Method
Remove the existing tiller extension and drill holes on the end of your new tiller addition to secure it using bolts with washers inside the carbon tube (as supplied with new boats from 1000 on).
Put tape around the existing tiller to create a tight fit when you slide the new addition over it.
Secure the new addition using the universal joint holes in the original tiller with a stainless steel screw (New boats have the tiller extension universal joint bolted to the tiller but there’s no way to get a spanner on the end of the bolt if you extend the tiller). To give the screw something to bite into, put a plastic wall anchor into the holes in the original tiller. Drill a small hole (or two holes) in your additional tube to line up with the original universal joint holes. You can adjust the length of the tiller by drilling extra holes in the additional tube.
Apply some tape over the join to reinforce it.
|
| Mainsheet Setup | We removed a loop of the 6:1 mainsheet block purchase to create a 4:1 purchase as it runs better and doesn’t overly strain the hands in winds up to 25 knots. On #1000+ boats you can remove a turn and still keep the small block (in case you need to revert to 6:1) by tying off through the middle of the small block with a bowline. |
Cunningham 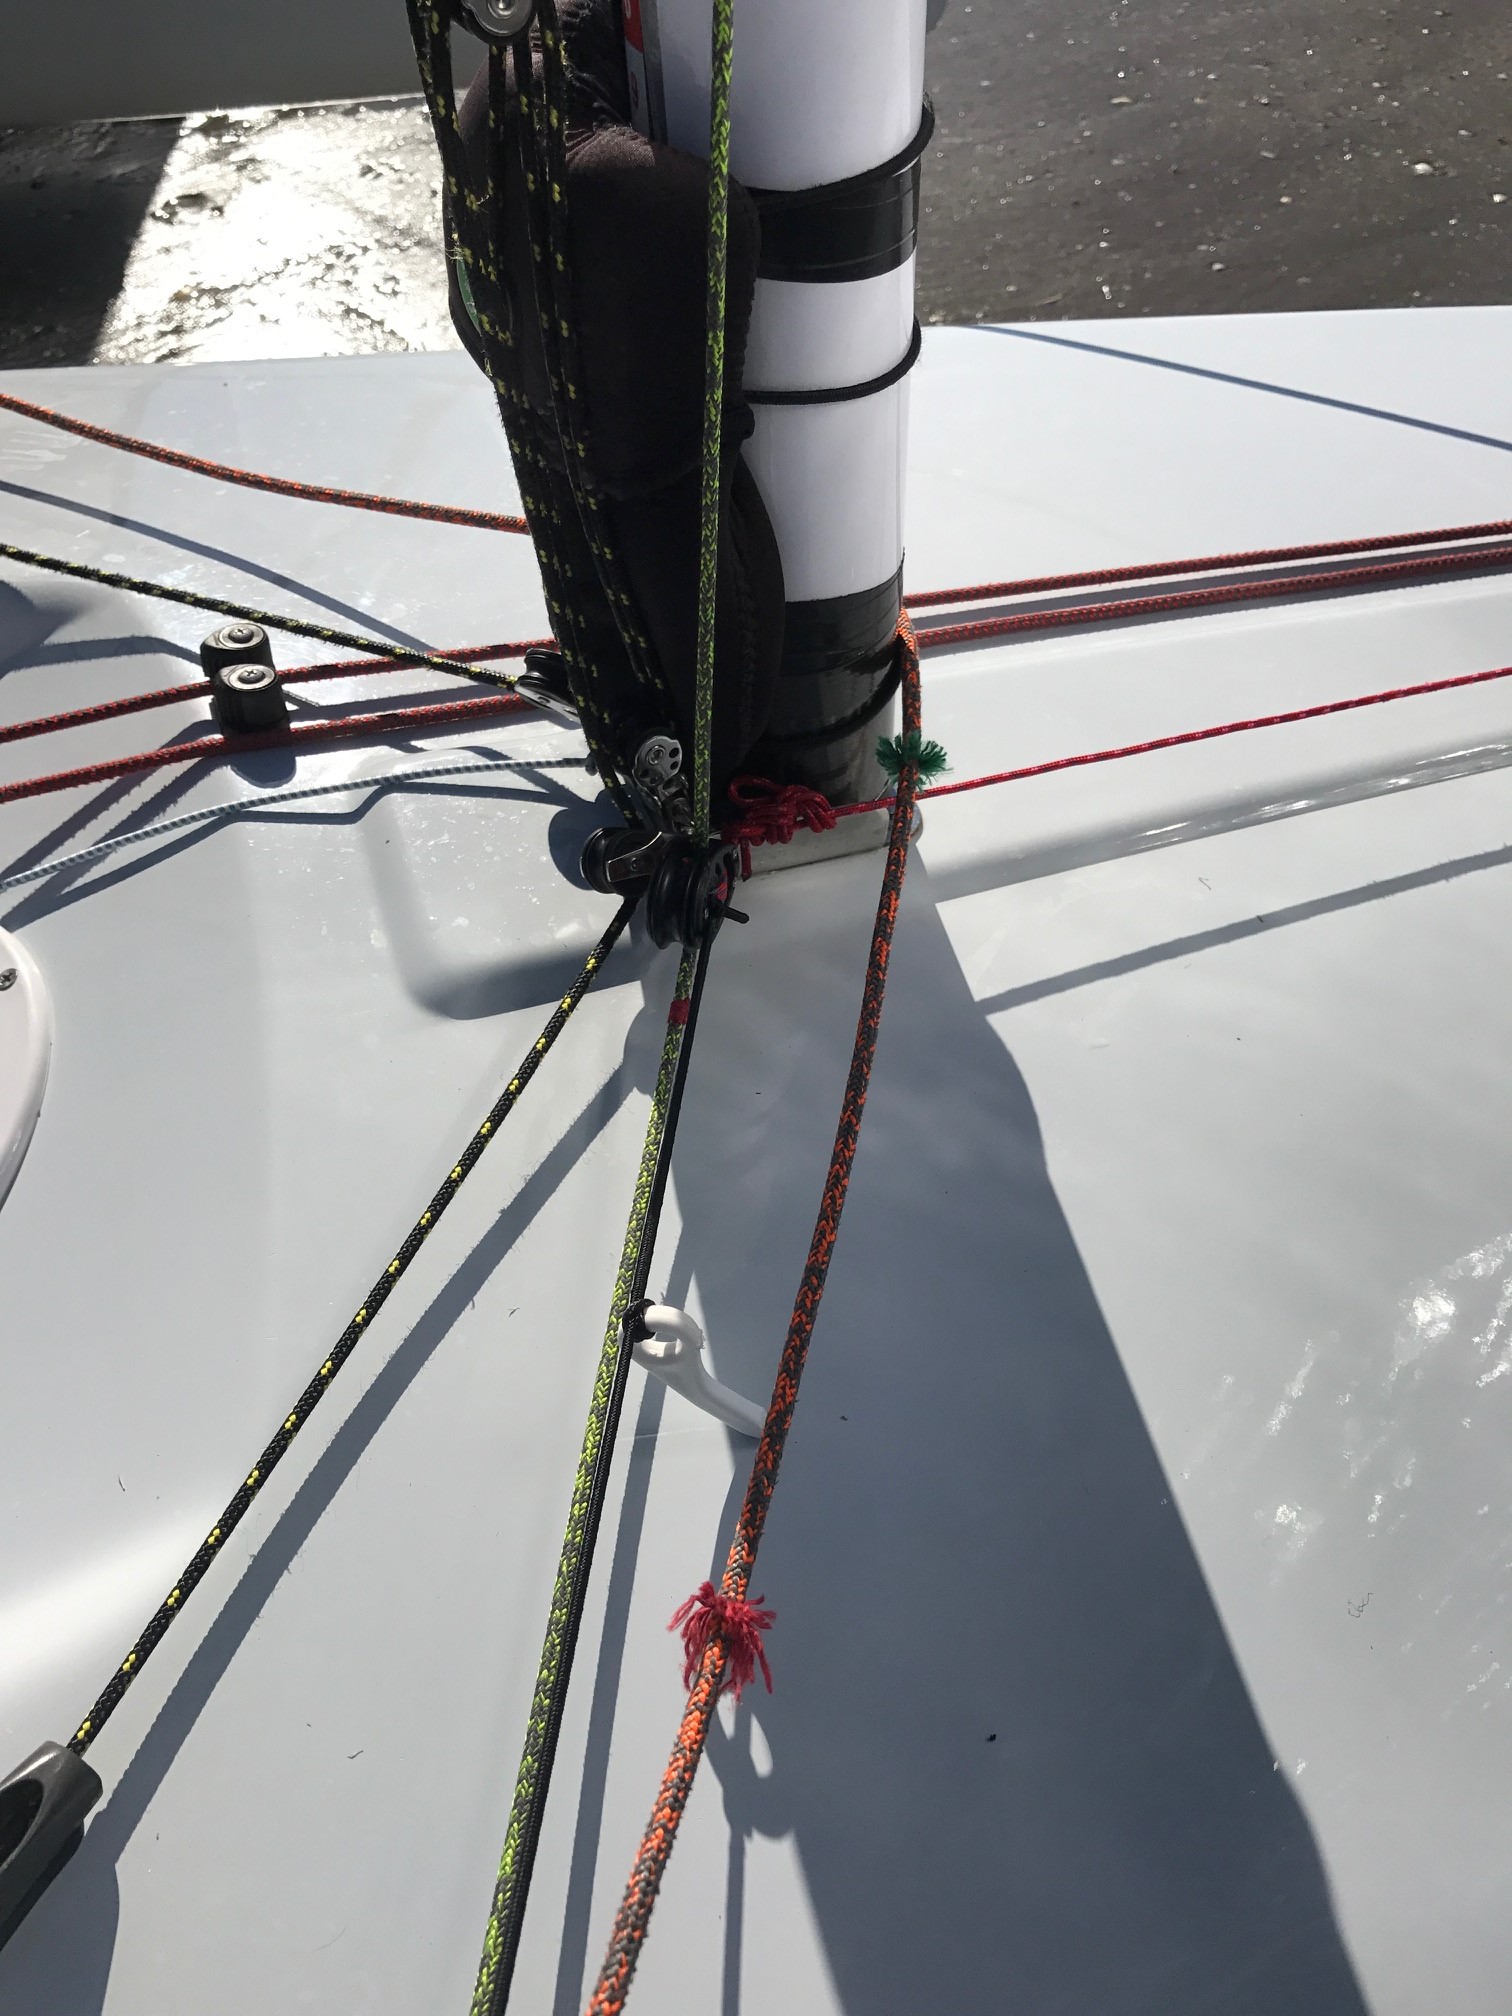 |
Martin added an extra block set to the Cunningham to create a 6:1 purchase which he says he really cranks on in a blow to flatten off the top of the sail (using North tri-radial cut). He also extended the Cunningham to the ama arms, tensioned with bungee and adjusted the angle of the cam cleats using plastic wedges beneath them. This allows him to adjust the Cunningham without coming in off the tramps.
The measurement tape on the mast allowed him to re-use settings depending on the conditions. The neoprene bag is used to stow the tails of the halyards after raising the sails to reduce windage and its neater than having them coiled halfway up the mast. A neoprene wine bottle cooler was also used by Paul for the same purpose. |
| Crossover Jib Sheets
|
We use crossover jib sheets since it means they’re always to hand even when hiking out, and less likely to get under your feet. Most were tied off using the handles on the edge of the tramp by the shroud but Martin added some shockcord to the tail to keep them taught. |
| Jib Cleat Replacement
|
One of the problems with the standard jib cleats is they are very difficult to release in winds over 20 knots. Martin and Paul replaced them with Spinlock PXR swivel base cam cleats that enable you to release them under load.
The only issue with the Spinlocks is they have to give a little in order to bite into the rope. A cheaper, and possibly better solution, used by the Kiwis is to use a 2:1 on the jib by taking the sheet through the cleat up to a block attached to the clew and then back to tie off on the cleat. |
Screecher drop system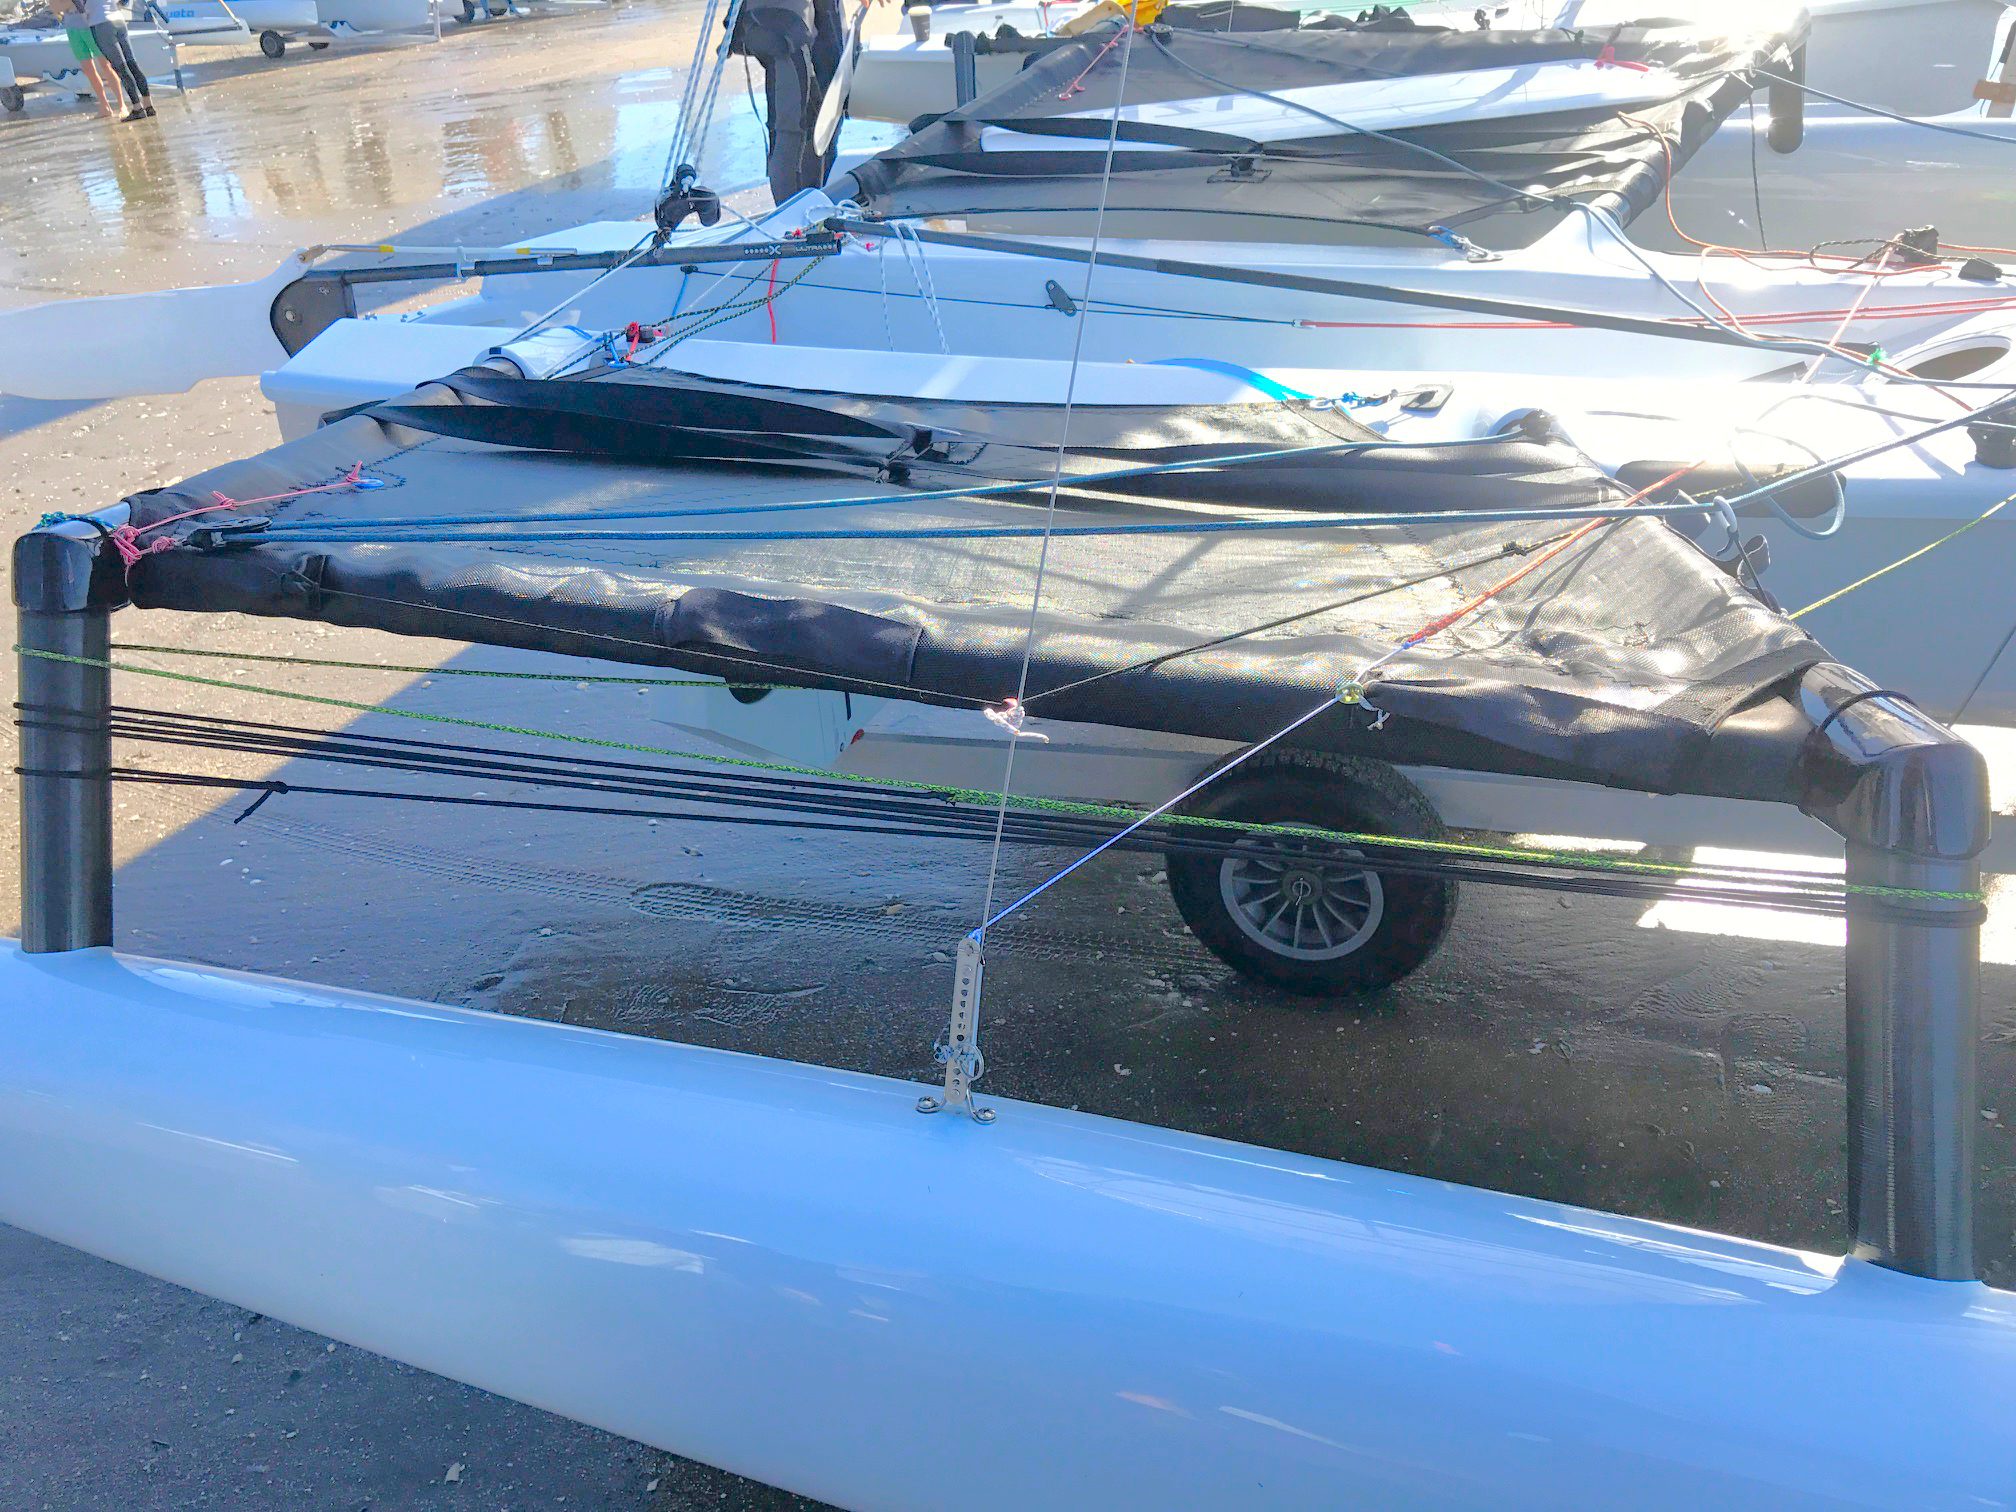 |
This is likely to be banned soon but many of the leaders were dropping the screecher for the first upwind leg (and some for every upwind leg) by uncleating it at the foot of the mast and then stowing it along the foredeck and into the cockpit.
A bungee system was used to take up the slack in the tail of the screecher halyard so that it remained ready for deployment as you approached the windward mark. Some boats ran their halyard bungee tension system up and down the length of the cockpit, Martin ran his between the ama uprights which meant that he could raise it on starboard tack approaching the windward mark. |
Screecher sheet forward turning blocks |
We added the turning blocks tied to the forward ama arms as shown in the Weta Owners Locker.
Benefits: It keeps the sheet out from under your feet, it means you’re less inclined to sit on it, it means you’re facing forward during the gybe and, as the sheet wraps further around the ratchet block, it improves the grip of the block on the sheet making it easier on your hands. Any block will do for the forward turning blocks but the Harken T2 Soft Attach blocks are designed to be lashed in place, contain no metal parts that could damage the hull and are available for 8mm (29mm) or 10mm rope (40mm). |
Screecher Sheet “Tweaker” |
To keep the sheets flat on the tramp, and thus less likely to get caught in the end of the tiller during a tack, we fed them through a plastic ring which was tied to bungee thread under the tramp and anchored through the screecher block lashing hole in the tramp and fed through a bead to hold it there. This also acts a little as a “Tweaker” to bring the clew of the sail outboard and keep it fuller for more depth. |
Screecher Ratchet Block location |
Martin had positioned the screecher ratchet block outboard to give a fuller sail and allow him to sail deeper but his system was adjustable so it could be moved inboard for a close reaching course.
Tony Sadler and Beryl Morris moved their screecher ratchet blocks inboard for a light wind race so they could use the screecher as a “code zero” which was very effective. This has also been implemented by using a longer lash to than normal to the attachment point on the tramp which means when the gennaker is pulled on the clew ends up further inboard. |
| Camelback drink bag
|
Located under the forward trampoline to allow rehydration while racing using the drinking tube. |
| Wind indicators
|
Mast head Windex systems were seen on a number of boats but this modified Laser mast fitting on the bowsprit seemed a better solution instead of craning your neck.
We all agreed that the wool tufts used as wind indicators on the North sails weren’t as good as the ripstop nylon versions on the Gaastra, as the wool tended to catch on the panel joins on the sail and they were hopeless when wet. Also the grey North sails were harder to see through than the clear Gaastra. To get around this we taped cassette tape either side of the clear window where it could easily be seen. Cassette tape doesn’t absorb water and with a knot in one end, doesn’t stick to the sail (some McLube or RainX on the window also helps). Additionally, Paul and Geoff had telltales on the luff of screecher (only works on Yellow or Red screechers since you can see through them) and Paul had a 30cm piece of cassette tape attached to the leech of the screecher about 30cm above the clew. This meant that when the sail was furled, a length of the tape would hang out of the furled sail and act as a wind indicator right in the line of sight. |
 |
T-Handles were used by a number of boats to ease getting back from the amas. Some were swaged in. Others were just whipped onto the shroud. Geoff had 1m of plastic pipe threaded down the shrouds to provide a handhold. |
| Additional hiking straps
|
Some were sewn in
Image 2 shows a padded Kiwi version that had a webbing loop that went right around the tramp, through the side hand hold loops, and was tensioned underneath across the ama arms (much easier to setup and easier to adjust for different crew) |
| Screecher sheet attachments
|
Dyneema “Pigs-tail” loops spliced into into joined ends of screecher sheets prevents the sheets from catching on the forestay during a gybe. |
| Additional Tweaks | Double Dyneema strops on Forestay ring for backup in case one lets go. Mainsheet halyard replaced with 2mm Dyneema core line to reduce wind resistance. This was then spliced onto a double wire leader loop secured with two swages to prevent it coming undone (which the standard single wire loop is prone to do).Some boats had dispensed with the wire leader altogether and just secured the mainsheet halyard in the V cleat using a knot in the Dyneema-core rope which is both lighter and less prone to failure due to misalignment with the V cleat. |


