- This topic has 1 reply, 1 voice, and was last updated 4 years, 3 months ago by
.
-
Topic
-
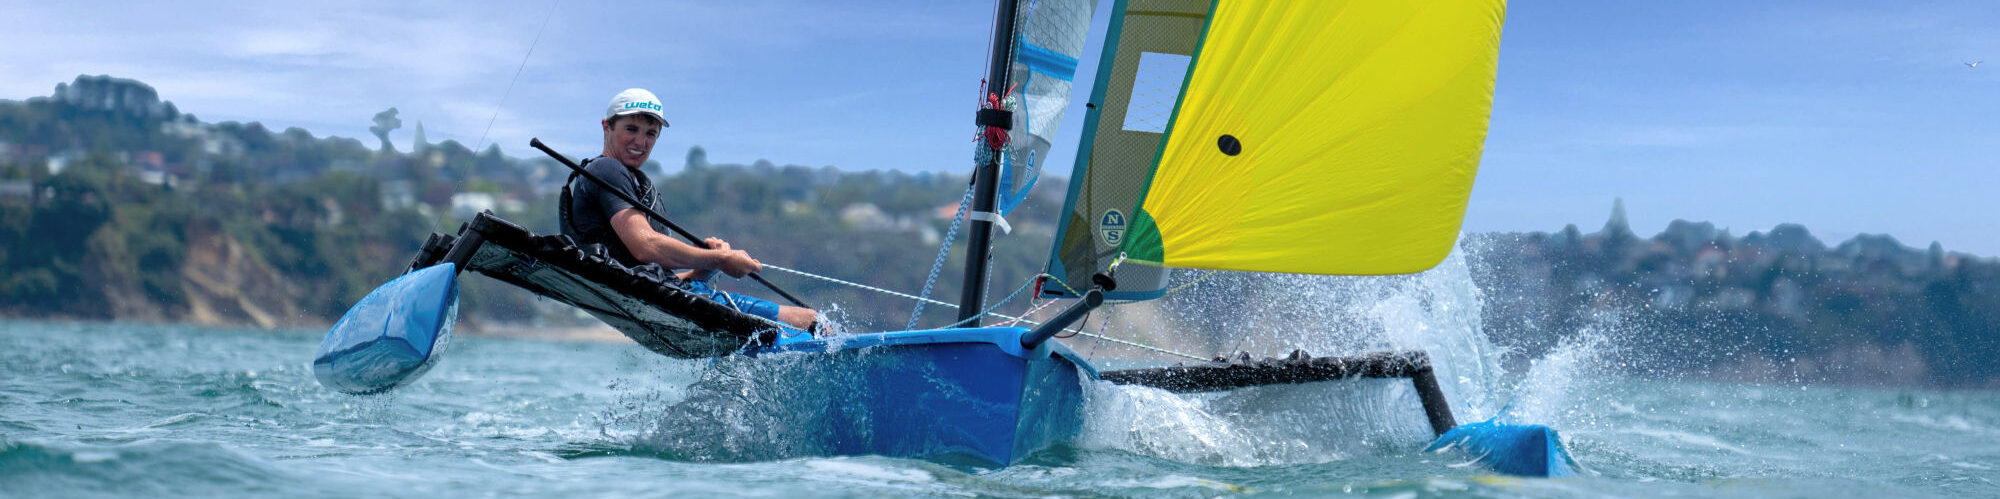
See the separate post on Action Cameras for a Weta
Probably the best place to mount it is on the end of a camera pole attached to the stern – since it gives you a view of your sailing activity and also the horizon and direction. However, you may not want to create holes in the hull to attach the mount.
The height of the pole is subjective and depends on the lens angle your camera can capture (150+ deg is good because of the width of the Weta). I’ve seen some cameras mounted as little as 20cm above the transom to others mounted 2m high – I have found it needs to be at least 1m long to avoid the majority of the spray – but you need to be aware of creating an obstruction for other boats on a crowded start line and the longer the pole the more it will vibrate.
There are a few options for this.
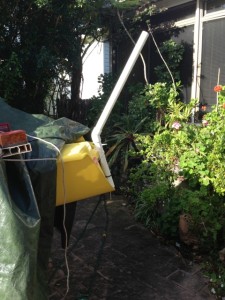
Suckastick
The Suckastick is a DIY camera pole which combines a glass suction handle and a broom handle (or other tube). The advantages are that it doesn’t require any holes in the hull, it’s really cheap to make, it can be transferred to other boats easily and because it’s braced against the transom bar and tied with a shock cord, it doesn’t produce much shake.


You will need:
– 1x Action Camera
– 1x Double Glass Suction Handle (e.g. http://tinyurl.com/handle-sucker)
– 1x Aluminium Broom Handle or similar pole (2cm diameter carbon tube is best for weight)
– 1x Action Camera Handlebar Mount for camera (ensure it can clamp on the tube)
– 2x Stainless steel hose clamps to fit 2.5cm/1″ tube
– 25cm of shock cord with clips both ends or shock cord sail tie with bobbles (used to secure the pole to the transom bar in place of the cable tie in the photo above).
– Electric drill, drill bits and screwdriver.
Method
1. Using a hacksaw, cut the suction handle vertically between the suction cups to give you two single cups with half a handle each.
3. Remove the plastic fittings from the broom handle pole – Drill out any rivets holding them in place.
Tip: Use a pair of mole/plumbers grips held loosely on the pole against the plastic grip and hit the grips with a hammer to remove the grip from the end of the pole.
2. If your pole diameter is too wide for the suction cup handle, cut the top of suction handle lengthwise to allow the pole to fit. Push the pole into the cut end of the suction handle so that it doesn’t interfere with the suction lever. If the pole is too narrow for the handle, wrap tape around it to acta as a shim so it fits tightly,
Tip: Use a screwdriver or marlin spike to open up the split in the handle while inserting the pole
3. Use the hose clamps to fix the broom handle in place by tightening it over the split suction handle.
5. Place the sucker so that it is against the wall of the cockpit of your Weta and the pole is resting against the transom bar (you may need to experiment with the location to get a flat surface). Pull down the lever to suck it in place (spraying some fresh water on the sucker helps create a good seal).
6. Put a piece of foam rubber (pipe lagging is good) around the base of the pole where it rests on the transom bar.
7. Loop shockcord or a bungee sail tie over the pole and the transom bar so that it crosses over and tighten to hold the pole firmly.
8. Clamp the camera mount to the pole and attach the camera so the crew is in the frame. (safety lanyard recommended).
9. If you don’t have a camera with a long battery life (e.g. 5hr Drift Ghost X) or if you need to start the camera on the water and don’t have a remote control or WiFi control, just unstick the sucker and tip the pole forward to so you can reach the camera from the cockpit. When finished, re-stick the sucker back in place when the camera is running.Note: The suction mechanism is mild steel and will gradually corrode. But since you have a spare sucker it’s easy to replace.
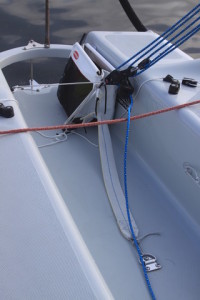
Waste Pipe Pole
Another Weta owner has developed a pole using waste pipe and push-fit connectors.
He cut a piece of pipe so it was above the height of the transom when resting on the stern lip and then flattened the plastic where it rests against the stern and transom bar using a butane torch (or cigarette lighter). Then joined the longer pipe to it with a 45 degree elbow joint. The base of the pipe is held against the stern with shockcord attached to the mainsheet floor ring and another loop (or cable ties) where it meets the transom bar.


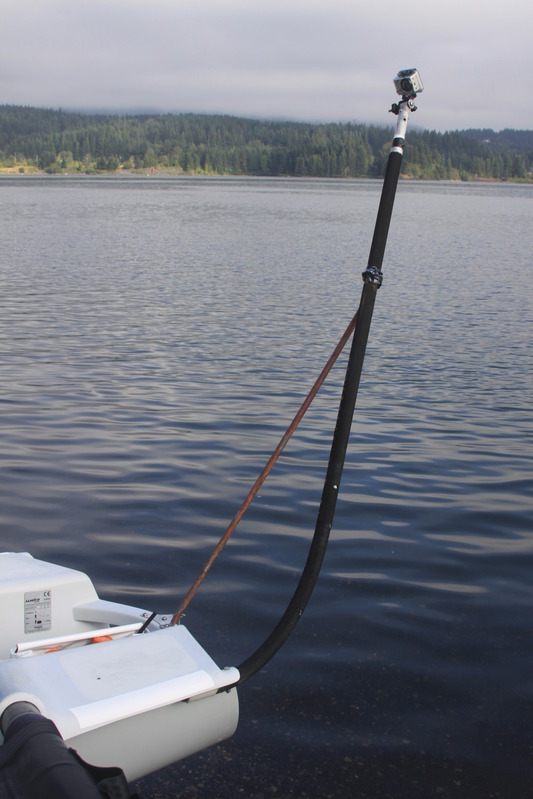
Windsurfer Wishbone
Dave from Weta West used 1/2 an old windsurfer wishbone which was bolted under the gunwale on one side and then braced with a piece of pipe bolted to the upper rudder gudgeon plate on the transom bar. It was very effective on his 2011 Double Dammed Race video. The downside is it does require holes in the gunwale.

NOTE There are many mounts to attach a camera to a pole but ensure they are made from 316 Stainless Steel or aluminium otherwise they can corrode quickly and result in loss of the camera.
Bowsprit Mounts
The 50m diameter of bowsprit means you need a roll-bar mount and to avoid the foot of the gennaker catching on the camera, you want a low profile solution (ie Avoid RAM Mounts).
I would also avoid the mounts which have long metal parts sticking out, (e.g. the Drift Roll Bar mount), as the furling line can catch in them and either damage the line or even pull the camera off.
TIP Avoid those that just clamp on to the bowsprit tube rather than having a mount that goes around the bowsprit.
-
This topic was modified 8 years, 9 months ago by
-
This topic was modified 8 years, 9 months ago by
-
This topic was modified 3 years, 11 months ago by
-
This topic was modified 3 years, 11 months ago by
-
This topic was modified 3 years, 11 months ago by
-
This topic was modified 3 years, 11 months ago by
-
This topic was modified 3 years, 1 month ago by
-
This topic was modified 2 years, 8 months ago by
-
This topic was modified 2 years, 8 months ago by
-
This topic was modified 2 years, 8 months ago by
-
This topic was modified 8 years, 9 months ago by


- You must be logged in to reply to this topic.