

Forum Replies Created
-
AuthorReplies
-
::
There’s been little change in the mainsheet block since the boats were launched – although the method of attaching it to the hull lashing has been improved.
There is a Phillips head screw in the middle of the block which allows you to adjust the angle of the becket with the cleat so you can lift the sheet out of the cleat when required. Loosen the screw (but don’t remove it) then stand beside the boat to adjust the angle to where you would normally sit. You could also take a small screwdriver sailing so you can make adjustments on the water.
As for the hook, the reason is there is it allows you to quickly unclip the mainsail and depower the rig – particularly when you come into the beach or ramp. It also allows you easily adjust the sheeting angle to flatten off the sail if the wind increases by moving the hook to a hole nearer the mast or towards the clew if the wind decreases. If you had the mainsheet block tied to the clew it would be very hard to make adjustments or untie while the sail is thrashing in the wind.
TIP Keep facing forward when tacking and gybing so your head is nowhere near the hook and you can see the bow to prevent the boat from turning too far. It helps to have the self tacking jib and twin tiller extensions so your hands are free during the turn. The Self Tacking Jib kit is available for boats #1-999 and 1000+. The Twin Tiller Extension kit will fit any Weta.
See the Weta Manual for more sailing and rigging tips https://tinyurl.com/wetamanual2022
-
This reply was modified 1 year, 1 month ago by
Paul White.
::Hi Mikko.
There are no additional bulkheads once you are past the one behind the daggerboard case but the space underneath the floor is limited as you can see if you look through the drain at the stern (an Endoscope attachment for your smartphone is inexpensive and makes it easy to check).
The bulkheads are marine ply I believe but coated in resin and fibreglass to make them stronger and impervious to water.
You could run the wires through electrical conduit tube to protect them either above the deck or underneath – although directing the tube through the hole in the rear bulkhead may be difficult – unless you add a larger hatch which would make the under deck storage more accessible.
I have also seen people run wires through the side deck by adding an inspection hatch to make it easier to access.::
The SJCAM C300 Pocket looks identical to the C200 but it has a 3 hour battery life at 1080p@ 30FPS (90 mins at “4K”*) and comes with a 10m IPX8 Perspex waterproof case. There is also an extended battery available which clips to the camera base but unfortunately it isn’t waterproof.
The C300 also works with the remote wrist control.
* Note that the specs claim the camera is capable of 4K recording but the chipset won’t allow it – so the 4K recording is actually 1080p upscaled to produce a 4K image but a lower resolution result.It does come supplied with a cable for an external power supply via the waterproof USB-C socket in the base of the camera but the male plug on the other end is USB – A. I have been unable to find an IPX8 seawater-proof power pack with a waterproof female USB-A Socket. You could put the power supply in an external waterproof case but you would need a way to make the cable run to the camera waterproof.
-
This reply was modified 1 year, 3 months ago by
::Wheelez have a European distributor in Spain.
I use a modified garden fence post bracket to secure the front of the trolley to the trailer.
The one I currently use is similar to this but I don’t install the bottom bolt cover so the side plates are longer.All I do is drill 4 holes for the U bolts which secure the bracket to the trailer.

It occurs to me you could do something similar to attach the trolley to the drawbar of the the hitch either using U bolts or through bolts.
TIP: Cover the securing bolt with a piece of plastic pipe to prevent it chafing on the aluminium trolley
Or get someone to make up a custom bracket with sides set diagonally to match the V angle of the trolley, similar to the images below.


You might find someone to design and create it through the Maker services here
There’s a Helsinki metal workshop which has done projects for trailers here
-
This reply was modified 1 year, 8 months ago by
-
This reply was modified 1 year, 8 months ago by
-
This reply was modified 1 year, 8 months ago by
-
This reply was modified 1 year, 8 months ago by
::This hitch kit from Wheelez may work
https://wheeleez.com/product/wz1-atvhk/
There’s also this to add an extra wheel at the front.
https://wheeleez.com/product/caster-assembly-complete-with-wheel-mounting-bushing/::If you discard the rudder Rod and use the bungee auto kickup setup instead you could still mount a camera on the tiller – but it is going to get a lot of spray there.
-
This reply was modified 1 year, 10 months ago by
::Osmo Action 5 Pro

Another boxy camera like the GoPro but the Osmo Action has a 4hr battery life which makes it much more appealing.
20 m waterproof (60 m with waterproof case)
240 mins record time
4K 60FPS recording
Image stabilising
Bluetooth & WifiOptional Accessories
Waterproof Remote Control
Bluetooth microphone
3 Battery Pack with chargerThe main downside is that’s it’s not cheap at over $550.
More here::SJ C200 (See also the identical SJ C300 below which takes 4K video and has 3hr battery life)
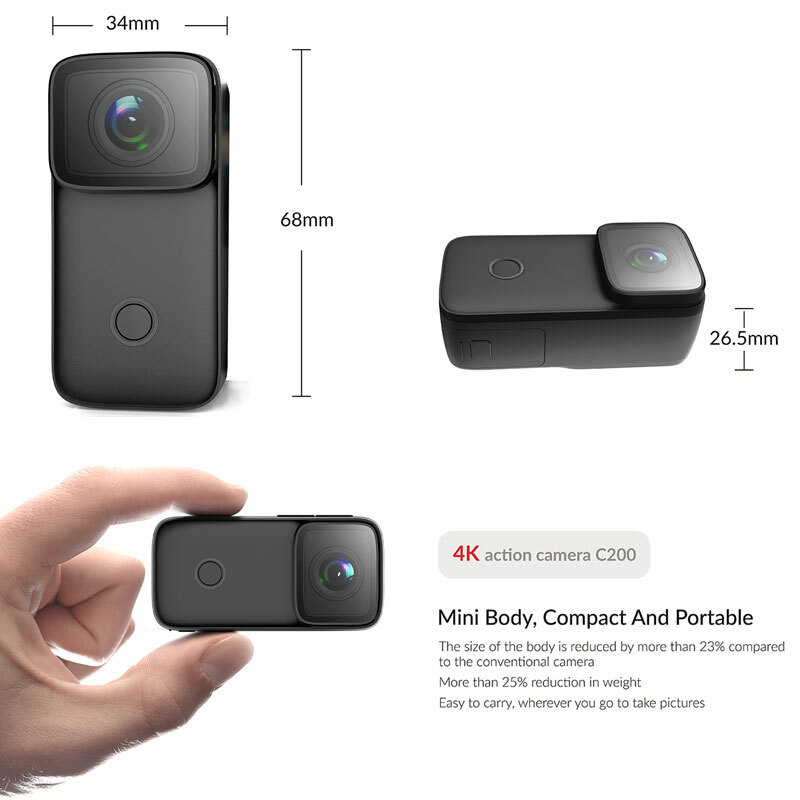
SJ Cameras were one of the earliest of the Chinese manufacturers to produce good quality Action Cameras which were well made with a wide range including GoPro and Sony clones and now the small format C100/C200.
NOTE: Do not confuse the C200 with the C200 Pro – the Pro shoots in 4K resolution but the battery life is only 90 minutes. The C200 only shoots in 1080p but has a battery life of up to 150 minutes.
Features (more info here)
Battery life to 150 minutes
Image Stabilisation
Waterproof to 5m (40m with waterproof case)
1080p 30fps resolution/frame rate
WiFi remote via phone app
Metal body for heat dispensation
Adhesive mount included
154 deg wide lens angle
GoPro compatible attachment for waterproof case

Optional Extras
Wrist mounted waterproof remote control (via Bluetooth)
-
This reply was modified 1 year, 3 months ago by
13 November 2024 at 3:00 am in reply to: Raising the mast made easy – no hinged mast step required #19209::Hi John
In fact his Weta is on the trolley – not the trailer.
However, he’s light (probably no more than 70Kg) and has placed his feet near the edge of the cockpit which is a reinforced area without putting an impact load on it. In fact that whole area has to be strong to be able to take the stress from the mast – you’ll notice the bulkhead inside the hatch which provides support for the mast. Just don’t jump on the flat sections.
There haven’t been any reports of cracks from standing on the deck but heavier sailors who slide down the tramp when tacking and then stop themselves by landing a foot hard on the cockpit edge, have caused cracks to appear from repeated hard impacts.
Newer boats (>1000) have a raised rib running along the foredeck which provides more strength for the deck if you need to walk forward while on the water to retie the gennaker or hoist/drop a sail (it’s easier to hoist/drop if you sit on the foredeck facing the mast).
Hope this helps
10 October 2024 at 12:31 am in reply to: Raising the mast made easy – no hinged mast step required #19205::Unfortunately the hinged mast base is out of production due to problems with quality.
You could try anchoring or tying up to the dock and then lowering the sails and drop the mast using an extra long forestay lashing fed back to the cockpit, and lowering the sails. Then reverse the process the other side of the bridge.
These links may help
Tow Loop, Anchor and Drogue for dropping mainsail on the water
Hope this helps
Paul
::Hi Nick
There are 4 potential launch sites depending on the state of the tide and where you plan to sail. Listed in order of distance from Mona Vale.
- Bayview Beach Boat Ramp
https://maps.app.goo.gl/Xgog8QSJqYeEQWtF6
Situated near the Tennis Courts, this concrete ramp on to the sand has excellent parking including parking reserved for cars with trailers. There’s also a BBQ and water available and toilets in the Rowland Reserve car park to the South. The beach is a mixture of firm and soft sand and slopes fairly gently before you get into deeper water. The only downside is when the tide is out it’s quite a long drag to get back to the ramp. - Bayview Yacht Racing Association
https://maps.app.goo.gl/j3VZfU4arhDP25qG8
The club house is only open at weekends and has toilets and showers but there is parking right next to the beach and it’s very convenient to launch from.
The tide does go out quite a long way and it is muddy if you have to pull your boat through it. - Long Beach via Delecta Ave
https://maps.app.goo.gl/kgTeS5iwFG4e4CoAA
This is further along towards Avalon and we have used it when racing in the Avalon SC Australia Day Regatta. There’s a sand ramp leading onto the beach from Delecta Ave but the beach is quite small when the tide is in – on the plus side it deepens fairly quickly. You’re unlikely to be able to park nearby but there are Toilets and facilities at the Clareville Beach Reserve, which also has a car park with 12h spaces which fill up quickly on weekends – you may have to park further along the Hudson Parade. - Sand Point Boat Ramp
https://maps.app.goo.gl/ePmsGamLPv2BZtbB8
This is used by Palm Beach Sailing Club (catamarans) which operates out of a nearby shed at the South end of Iluka Rd (no facilities).
There is parking in Iluka Road car park which has toilets but that can get busy at weekends. There’s a cafe (Coast 7am-2pm) nearby on Barrnejoey Road. The ramp is a bit narrow and mainly used by fishermen. Better to launch from the beach South of the ramp.
There is a grassy area above the beach (West of the ramp) for rigging up but the sand bank to get down is quite steep.
Hope this helps
Paul-
This reply was modified 2 years, 7 months ago by
-
This reply was modified 2 years, 7 months ago by
-
This reply was modified 2 years, 7 months ago by
::The TEMO comes with the Rowlock fitting which contains screws and bolts for attachment.
https://www.temofrance.com/en_GB/shop/t450-temo-450-104
Rowlock
https://www.temofrance.com/en_GB/shop/sem-1500-rowlock-fitting-9On a Weta I’d recommend using the bolts and installing a curved metal plate under the gunwale to reinforce it.
I have tried to contact Oliver via the French Weta Class forum without success – there’s a thread here.
https://forum.wetaclassefrance.com/viewtopic.php?t=883
::O rings are available on eBay etc.
Tip: Wrap some plumbers PTFE tape around the thread of the hatch for a watertight seal.
The man at the factory who made covers died during Covid and they haven’t found a replacement.
I have found a 5m speedboat cover works well. I don’t know your location so I can’t recommend a supplier.
East Coast Sailboats have the widest range of spares in the USA.
Paul
Weta Sydney-
This reply was modified 3 years, 5 months ago by
-
This reply was modified 3 years, 5 months ago by
-
This reply was modified 3 years, 5 months ago by
-
This reply was modified 1 year, 1 month ago by
-
AuthorReplies
